On this page
Part 2 of 8 in the bathroom & mould series
- Run the exhaust fan for about 10 minutes after showering
- Dry-wipe bathroom surfaces to lower humidity
A shower is an inherently damp place. Regardless of how well you clean the room, the combination of water and steam makes the air humid and warm, thus enabling moisture to settle on all surfaces. Keeping a bathroom dry takes a bit of effort, and more often than not, it is left to air dry which, in turn, allows the moisture to sit for a while. To that end, it’s not really surprising that mould could develop over time. Very often, mould is found on the silicone sealant that is used in showers and toilets. If you notice blackening on the edges of your fixtures in the bathroom, between tiles, on your shower door/curtain, etc., then you are potentially dealing with a mould problem. Regardless of whether the mould growth is limited to the silicone sealant in your shower, or it is an infestation, getting rid of mould in your home is critically important!
Risks of Mould
 While the mould might seem like a minor inconvenience on the surface, it could potentially lead to serious damage to your home, as well as put your health, or others’ health at risk.
- Spores from mould can be detrimental to your lungs if you inhale them. Restricting breathing by causing irritation, it can cause allergic reactions, and even require hospitalization for treatment if one is exposed to it for too long. This is particularly important to note for individuals with respiratory conditions like asthma. Occasionally, physical contact with the mould as well, could cause an allergy to trigger in some people.
- Besides the mould itself, mould growth on walls in your home is an indication of a more serious issue. Possibly due to bad waterproofing or leaks, soaking water into any structure lowers its strength and integrity. It’s always a good idea to get a professional involved when dealing with larger infestations because underlying, but possibly unknown problems, need to be addressed too.
With that said, if you are dealing with mould on the silicone sealant of your shower, there are a couple of ways to get rid of it.
How to Remove Mould from Silicone Sealant in the Shower
 While there are several types of mould that can develop in damp places, the one you will find in this particular situation tends to be fairly easy to get rid of.For a thorough removal of the mould present on your shower’s silicone sealant, will need the following tools and equipment:
Cleaning without Bleach
- Nitrile/Latex Gloves
- Spray Bottle
- Old Toothbrush
- Toilet Paper
- Clean Cloths
- Distilled White Vinegar
Cleaning with Bleach:
- Nitrile/Latex Gloves
- Face Mask
- Old Toothbrush
- Clean Cloths
- Plastic Wrap
- Bleach
- Baking Soda
Removing Mould without Bleach
Being the healthier option here, it is advisable to begin with a natural approach to removing mould from your silicone sealant. Additionally, it is relatively inexpensive and eco-friendly.Here are the steps to follow:
- Begin by putting on the gloves, and pouring the vinegar into a spray bottle.
- Spray the full-strength vinegar over the entire line of sealant regardless of whether there is visible mould or not. Allow it to sit for a few minutes before you try to wipe the mould off with a clean cloth.
- If you’re dealing with hard to reach corners, spray the vinegar onto an old toothbrush, and gently scrub it into the corner.
- Rinse off the area and blot it with a clean cloth to help dry the sealant faster.
If the steps above are not effective in removing stubborn mould, try the alternative natural method below:
- Tear off some toilet paper and spray it with vinegar until it is soaked
- Place the paper over the mould that’s left behind, and let it sit for a few hours.
- Remove the toilet paper and scrub the area with a soft toothbrush.
- Finish off by rinsing the silicone thoroughly and drying it with a clean cloth.
Removing the Mould with Bleach
In the unlikely event you’re dealing with some really stubborn mould, you might have to consider using more aggressive cleaners like bleach and baking soda. Keep in mind that you must wear a facemask when working with bleach as the fumes tend to be toxic. Moreover, bathrooms are typically small places and therefore, trap the fumes inside.Here is how to clean the silicone sealant in your bathroom using bleach:
- In a bowl, mix the bleach and baking soda until you achieve a paste-like consistency. Stick to a 2:1 ratio as you will require more bleach than baking soda since the latter ingredient is simply used to add more powder to the mix to get the right pasty consistency.
- Putting a generous amount of this paste on an old, soft toothbrush, begin gently scrubbing the mixture into the mouldy sealant.
- Once brushed and applied, put a plastic wrap over the area to prevent the paste from drying out entirely.
- You must then allow it to sit for a few hours before scrubbing and wiping the mould off with a damp cloth.
Tips to Prevent Mould from Developing
 Now that the removal of the mould has been discussed, it’s good to keep in mind the means to avoid having it creep up again. You will find the tips below to be very effective in doing just that:
- Exhaust fan: After using the bathroom, leave your exhaust fan on for about 10 minutes. This allows the room some time to dry out any moisture left behind.
- Dehumidifier: If you have a dehumidifier, running it in the bathroom after every use helps reduce humidity better than any exhaust fan could.
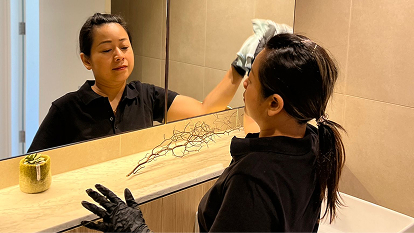
- Dry-Wipe: Using a dry cloth, wipe down all surfaces in the bathroom. Soaking up the moisture on surfaces is the simplest way to lower the humidity in the room.
- Vinegar Spray: If you’re keen on really making sure the mould doesn’t come back, a good practice is to spray all surfaces with vinegar every time you clean the bathroom. Doing this more regularly yields better results.
To conclude, the lower the humidity in the area, the better it is for keeping the mould at bay. Keeping all spaces clean and dry as much as possible on a regular basis, ensures you will not have to deal with this problem again. A professional cleaning service like Maid For You is your best bet for eliminating mould from your silicone sealant in the shower and other bathroom areas while also preventing it from coming back!
| What you notice | What to do |
|---|---|
| Light mould along the sealant | Spray full-strength white vinegar, leave a few minutes, wipe off |
| Mould in hard-to-reach corners | Spray vinegar onto an old toothbrush and gently scrub |
| Mould still there after wiping | Cover with vinegar-soaked toilet paper for a few hours, then scrub |
| Very stubborn mould | Bleach and baking soda paste (2:1), cover with plastic wrap, wait hours |
When to call a professional
Surface mould on silicone, tiles and grout can be treated as part of a professional deep clean. When black marks remain after treatment, the mould has usually grown into the silicone itself, and the fix is to have the sealant removed and replaced. Mould on walls may also point to leaks or poor waterproofing, which needs a professional to inspect.