Mirrors don’t stay clean for too long thanks to dust, greasy fingers, and spots caused by various factors. What’s worse, though, is that most attempts to clean mirrors to perfection end up falling short. If there aren’t streaks left on the glass after you’ve finished, there’s always something else like dirty corners that you simply couldn’t get clean enough.
Although it seems like cleaning mirrors is such a simple task, especially when using a store-bought product, if you want to know how to clean mirrors without windex and still get those spotless results, there’s a little more to it than you think! With or without commercial glass cleaners, there are some crucial dos and don’ts to keep in mind when cleaning your mirrors to ensure a thorough, all-round clean. In fact, it’s less about the best mirror cleaner and more about the cleaning method, tools, and techniques.
So, let’s get right to it then; here’s what you should and shouldn’t do when attempting to clean your mirrors and keep them shining!
The Dos

Before we share the steps on how to clean your mirror the right way, you need to make sure that you have everything required for the job. You will find the relevant ‘dos’ against each item listed below:
Dust Cloth and Toothbrush
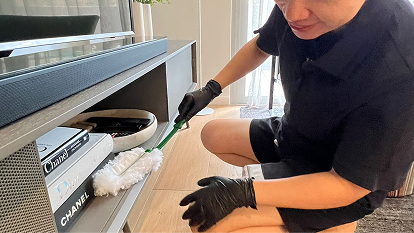
Before you clean any surface, be it glass or wood, the first step is to remove dust. This includes corners which can be cleaned with an old toothbrush.
Rubbing Alcohol
This is basically your stain remover and it’s fantastic for glass surfaces in particular. Removing mirror stains efficiently before you clean the rest of the surface will make the job much easier, and yield a more satisfactory end result.
Cotton
Either regular cotton or cotton face pads can be used with the rubbing alcohol to remove stains from your mirror. Avoid cleaning cloths and sponges.
Lint-Free Cloths
You know the type of microfibre cloths that come in a spectacle case, or those used to wipe appliances and window screens? They feature a flat-weave which is ideal for cleaning mirrors and glass surfaces because they do not leave any lint behind.
Vinegar
This will be mixed in water to make an effective, homemade glass cleaner. We always prefer natural cleaning solutions because there’s no worry of chemical residue left on the surface.
How to Clean Mirrors in 5 Simple Steps

- Start by cleaning corners and edges where dust tends to accumulate over time. An old toothbrush is perfect for flicking out dust from these narrow spaces between the glass and frame. Clean the rest of the surface by wiping the mirror with a clean, dry dust cloth. Never use a damp cloth to wipe mirrors even though it is an effective way to pick up dust from a surface. In this case, it will only make a bigger mess on the mirror.
- Check the mirror for stains, marks, and/or spots caused my toothpaste, cosmetic products, and grubby fingers. Spot clean these areas with rubbing alcohol and cotton. There’s no need to soak the cotton in the solution; just dab on a little bit and clean the glass in quick, circular motions. Rubbing alcohol tends to evaporate rather quickly so it’s important to work fast for desirable results.
- Next, mix equal parts water and white vinegar; pour it into a spray bottle and shake well. Spray the mirror from a distance so that you don’t end up wetting the glass to the point where the cleaning solution is dripping down. You can work much more efficiently when the glass is not soaking because it allows you to clean one half at a time as opposed to wiping the whole glass as the cleaner drips to the bottom and begins drying up.
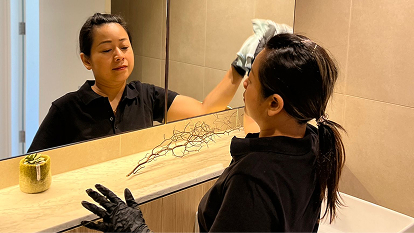
- The best way to prevent streaks on your mirror is by wiping the glass in circular motions or ‘S’ patterns. These quick swipes do not allow streaks to form because there are no straight lines involved when cleaning in this manner. After you’ve cleaned the top half, slightly overlap it as you clean the bottom of the mirror. If needed, use the other side of your flat-weave microfibre cloth, or fold it in half to clean with a fresh side.
- Although this is optional, if you’d like to go one step further, buff the mirror with a lint-free cloth immediately after and you will be left with a gleaming, spot-free and streak-free mirror!
To keep your mirrors sparkling and spotless for a longer time, give them a daily wipe down using a lint-free cloth. It also helps to tackle stains with your trusty rubbing alcohol and cotton pads so that the mirror won’t require thorough cleaning too often.
The Don’ts

There’s a lot of information out there on how to clean mirrors, windows and glass surfaces which encourages people to substitute cleaning products, tools, and techniques as per their convenience. Unfortunately, this often leads to unsatisfactory results because, as mentioned earlier, there are dos and don’ts to keep in mind if you want to achieve those sparkling results.
Now that you know the right way to clean your mirrors, let’s take a look at some of the ‘don’ts’ (in case you’re tempted to stray from the ‘dos’).
- Avoid using expired products or old cleaning solutions that have been stored for more than a month; they tend to leave the glass hazy.
- Although newspapers have been a favourable cleaning tool in the past, the quality of the ink used in print nowadays does not yield the same results as before so stay clear of them.
- Like newspapers, paper towels are also advised against because they leave behind lint-like residue.
- Avoid cleaning solutions that create suds on the mirror as this will lead to streaks on the glass.
- Never apply a cleaning product to the mirror until you have thoroughly removed dust, dirt, and stains. Any other way only adds to your work.
- As much as you possibly can, avoid touching the mirror with your fingers or hands as this will leave unsightly marks and smears on the surface.
In conclusion, all it takes is a couple of minutes to implement these ‘dos’ when following our step-by-step mirror cleaning guide while, of course, keeping the ‘don’ts’ firmly in mind!
Mirrors and glass are on the checklist for every end of lease cleaning job.
When to call a professional
Streaks that come back no matter how carefully you clean often mean residue from old products has built up on the glass. A regular clean keeps mirrors and glass streak-free with the right cloths and technique. Dark patches or flaking behind the glass are damage to the mirror backing and need a glazier, not cleaning.